Thursday, March 6, 2014

Day 10- Totally Nailed It

3/5/14

It's amazing how much you can do in a day.
Today was the hardware challenge, based on the poll that was up for the last 2 days on the blog. I've always enjoyed any reason to go into a hardware store because I love looking at the variety of things, be it paint swatches or rolls of vinyl or even bolts.

This morning I went to the hardware store to collect some items for today's piece. I had some ideas about what I was going to do, but I got fixated on the wall of nails once it came time to make decisions. I purchased a variety of nails and tacks, as well as a handle for a drawer and some corner braces. I got such a random collection of things I'm certain the guy running the store thought I was a bit crazy.


I was really interested in the idea of using the nails as a sort of fringe. I love that as individual pieces they are rather unremarkable and utilitarian but all together they have such a rich texture. I attempted to crochet some thread and insert the nails as I went to make a chain of nails but it wasn't consistent and was far too time consuming.


I pulled out a ball of 2 ply yarn and attempted to insert the nails at every twist. To my amazement it worked. Perfectly. So I cut many strands of yarn to the same length and began to insert the nails at approximately 1/4" intervals. I started with the dark steel grey tacks which were the shortest pieces I had, and then made a few strands of different length nails in silver. I had to go back to the store and buy more nails and in addition to buying more dark grey tacks, I bought a variety of lengths in a medium grey color. I decided not only to do a gradation of length but also of color.

The most painstaking part of this process was hand stitching the lengths of yarn in between each nail to the fabric. I made a fabric out of lengths of black strap ribbon sewn together at the sides. The strap material is very strong and can hold the weight of the nails (which ended up being pretty heavy.) I sewed the yarn/nail combo strips on from bottom to top. I'm grateful that I loved the way it looked as I went or I would've lost interest along the way. But it looked so cool that I was hooked. This is also why I have so many progress pictures...


Notice the slight gradation of color from top to bottom. There are three shades of silver.


Canvas handbag, strap ribbon, assorted nails, alpaca yarn, velvet ribbon
I edged the top with a 1/2" velvet ribbon to give it a little bit more of a polished edge. Honestly, the materials I worked with to build the bag itself weren't as great as the nail-fabric treatment really deserved so I will likely go back and reassemble the piece in a little bit more of a structured way. I toyed with the idea of using some of the corner braces painted black along the top, but the structure of the bag made them look sloppy. I will definitely consider adding some more hardware components the next time around.

I've also found in the process that the nails on yarn makes a fantastic necklace. Expect to see that one another day.

This was a project where I was so inspired the whole way through that it made me appreciate the time I am taking to complete this 30 day project. Thank you, SO much, everyone who voted on this project (I hope you love the result!) and everyone who keeps up with this blog! If you have ideas for another challenge, leave me a note in the comments.

xo,
Arielle

Tuesday, March 4, 2014

Day 9- Necklace with Concentric Circles

3/4/14

While sorting my materials yesterday I came across beautiful cerulean pebbled leather and noticed that an assortment of my crystals were the same shade of blue. I thought it would be interesting to use an almost invisible tulle over the crystals to hold them on the leather and I found a light grey piece that worked quite well. I experimented with machine sewing the tulle around the crystals which proved to be very difficult because you can't get close to the crystal, even with a zipper foot. 

I decided to try a method where the stitch would be further away from the crystal, by doing a double layer of leather underneath in a contrasting shade. My inspiration for the layered circle shape came from a Kandinsky print my grandmother recently gave me; one of his circle pieces. I love the 3D element to the 2D piece that comes from the color variation of the rings. 
Squares with Concentric Circles, Wassily Kandinsky
I cut circles from a reddish brown leather and smaller circles from the cerulean leather, placed a donut shaped Swarovski crystal in the center and tulle on the top and bottom. I carefully stitched around the second leather ring to hold the layers in place. Then I cut the circle elements apart. 

I crocheted four circles in an alpaca yarn in a color slightly redder than the leather and one row larger. 


It's easier to see the tulle in this photo; the blue leather and crystal are not stitched, only held on by the tulle.


After stitching the leather pieces to the crocheted pieces, I added another crystal at the bottom of each circle, and attached a copper chain to the back. 

Necklace, alpaca yarn, copper chain, leather, Swarovski crystal

In the morning I'll check the poll to see what materials I'll be using for Day 10! Voting is open until 9:00 AM EST on 3/5.

xo,
Arielle

Day 8- Symptoms of Applique Addiction


3/3/14

I can't stop it with the applique.
But I got another garment done, so that's a success!
Wanted to try some sleeves today, originally in jersey, but I decided to keep it simple and work on a medium weight grey non-stretch cotton. I cut a cap sleeve because the embroidery was going to make the sleeve heavy and I didn't want it to be too overbearing.


Applique pieces from an upholstery swatch on both sleeves

I used an awesome upholstery swatch that I'd been eyeing for a project, but it was so small so there wasn't much else I could do with it. I cut it into a set of appliques for the sleeves, and cut a peephole where I inserted another grey fabric with a woven black pattern. I used a bright yellow thread for the applique to give it some punch, and then added the gradated yarn with magenta thread.


I had intended to use a grey fabric for the body of the piece but found a matching magenta charmeuse which I turned to the backside so it wouldn't be shiny. The drape is perfect and it gives a slightly dressier feel.

I decided that to offset the structure of the appliqued sleeves the top should be flowy and full, so the crew neck bodice got a slightly a-line hem. After the sleeves were hemmed I applied yarn to hide the stitches, and though I considered embroidering the neckline I decided to leave it unadorned.

Blouse, magenta charmeuse (backside), grey cotton, polyester applique and wool yarn trim


Back to accessories tomorrow <3 I have some beautiful handmade ceramic buttons I'd really like to use.

Don't forget to vote on what material I'll be using Wednesday! The poll is on the top right of the main page.

xo,
Arielle

My blog is now available to follow on www.bloglovin.com!

Sunday, March 2, 2014

Day 7- An Applique Adventure

3/2/14

I'd been saying for a few days now: "tomorrow I'll do a garment." Today is finally tomorrow.

I wanted to get back to some of the applique I experimented with on the first day so I chose a thick jersey that wouldn't need much tailoring to make a pencil skirt and allow me to focus on the applique.


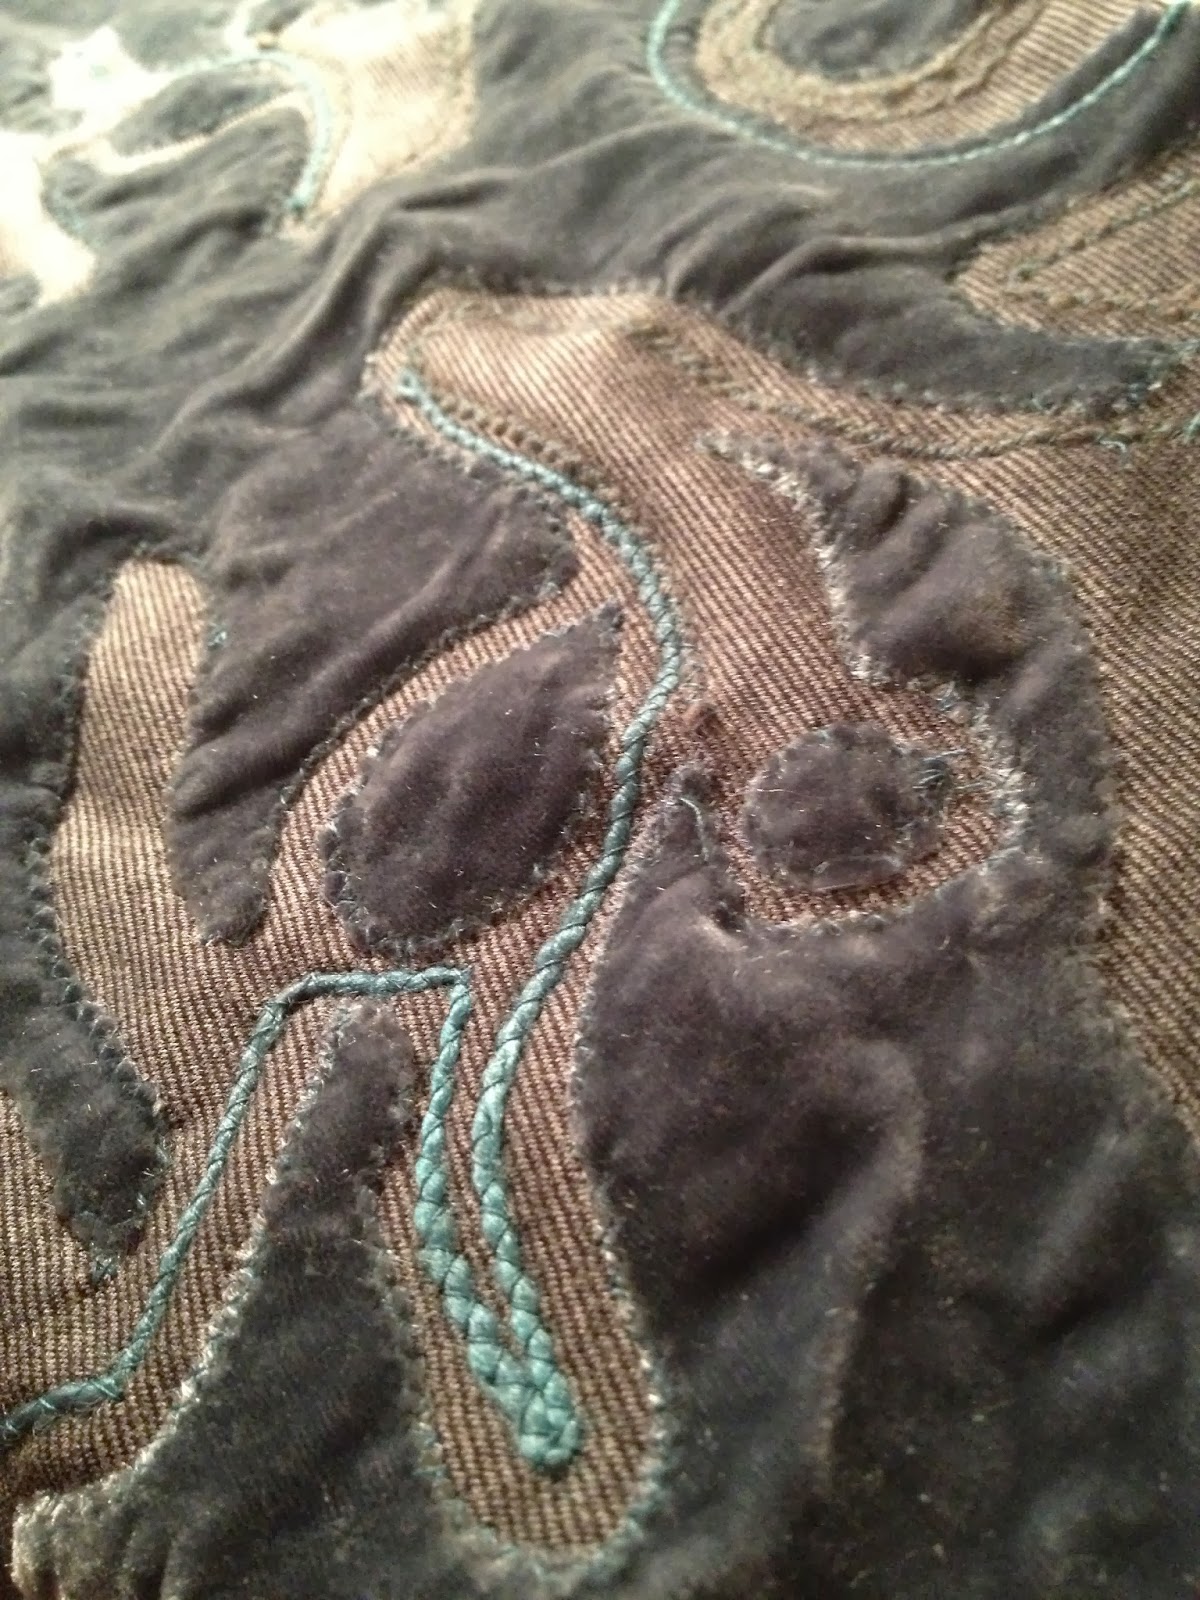
I pulled out a dusty teal silk velvet from my Parsons senior thesis and resumed the paper cutting technique for an applique pattern that I used on Day 1. Between the colors and the shapes, I wanted a sort of dark forest feel. 

Because velvet sheds so much and silk is a fidgety fabric, the applique was a major challenge to apply and I actually almost quit in the middle. After adjusting the width of the zigzag stitch on my machine several times I found a setting that made it easier. 


After all the velvet was applied I wanted to embroider some of the hand dyed yarns I had originally bought to match the velvet. I considered a binding stitch on the edge of the velvet, but decided to attempt a technique I had been thinking about: a zigzag stitch over yarn. It worked perfectly. I'm thrilled with the result and will definitely try that again on another project. 


I used both a grey wool yarn to match the jersey and the hand dyed teal yarn that is a silk/wool blend. I inserted a lining in the same grey jersey (thick jersey lining = amazing control top!) and a velvet waistband that is jersey on the back so it stays stretchy enough not to need a zipper. 

Grey pencil skirt: Cotton/poly blend jersey with silk velvet applique and wool and silk yarn embroidery
Eunice is a wonderful model.

Really love the way the applique came out. Going to keep working these techniques! The potential for texture and dimensional quality is excellent.

Take a minute and find the poll on the upper right corner of the page to choose what material I'll be working with next! 

xo,
Arielle 

Day 6- The Brown Paper Bag

3/1/14

Tonight I played with Kraft paper, one of the many rolls I bought in my excitement to start this project but that I hadn't even opened yet. Last night I got into a conversation about brown paper bag lunches which made me think about making a brown paper bag... On my Day 1 post I mentioned the idea of stitching on paper; an idea I saw at the Museum of American Folk Art in the gift shop there. I decided on a scalloped motif for the piece and got out my pinking shears to give it a lacier effect.

I started cutting brown paper strips and giving them a scalloped edge, and then stitching along the inside of the scallop. Next time I stitch into Kraft paper I will try white thread; I think it would look really sharp. I pulled out a Tiffany's ad from an old magazine and cut scalloped strips from the blue color too.


Different stitch patterns on the paper strips


To give it a little glam and dimension, I added long glass tube beads on the brown paper strips. I glued them to hold them in place while I hand stitched them on. I realized too late that I didn't make the strips wide enough because after I stitched it all down it ended up being more of a square shape and I had really wanted a long rectangular shape.
Tube beading on the Kraft Paper


I decided to fill out the sides with some perpendicular strips and use the original piece as a front pocket. I lined the inside with a very stiff interfacing covered in more Kraft paper, and I closed up the sides with triangular pieces of paper. The bag is sturdy enough to stand on its own and is very structured on the bottom. The front pocket is about 7 inches wide.

Brown Paper Bag: Kraft paper, magazine paper, gold tube beads


Some ideas for next time around:
1. Mixing the Kraft paper with some tracing paper or plain papers of different qualities
2. Spray painting, hand painting, or dyeing the paper
3. Using a hole punch or an awl to make a decorative lace effect.

Any ideas for different materials to try?

xo,
Arielle